 |
| Simple guide to tagging to quickly open files on Windows 10 |
Searching for files on a Windows computer can sometimes take a lot of time, especially when you have too much data stored. On Windows 10, the file tagging feature helps you categorize and retrieve files quickly with just a few simple searches. This article will guide you on how to tag files to open them quickly on Windows 10, applicable to both formats supported and not supported by Microsoft.
How to tag files supported by Windows
With Microsoft supported file formats, you can easily tag them for faster searching later. Here's how:
Step 1: Find the file you want to tag, right-click and select Properties .
Step 2: Switch to the Details tab.
Step 3: Find the Tags field, then enter the keywords you want to tag the file. You can tag multiple times , just separate them with a semicolon ( ; ).
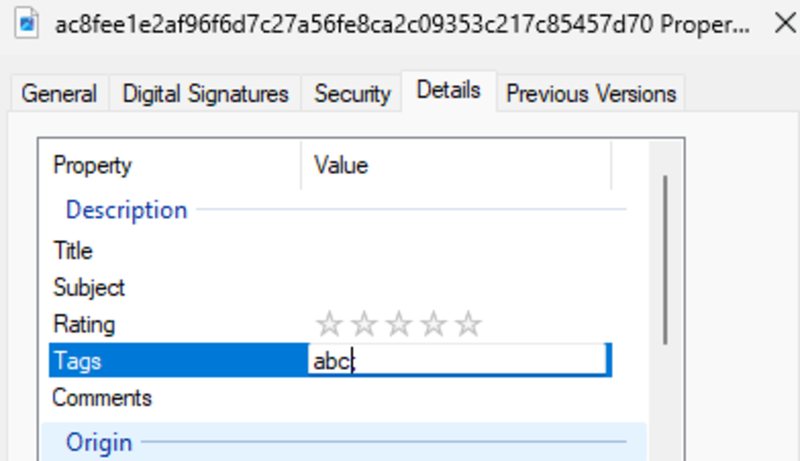 |
| Find Field Tags |
Step 4: Click OK to save.
From now on, just type a keyword (tag) into the search box in File Explorer, all files with the same tag will appear , saving a lot of time.
 |
| Click OK to save. |
How to tag files not supported by Windows
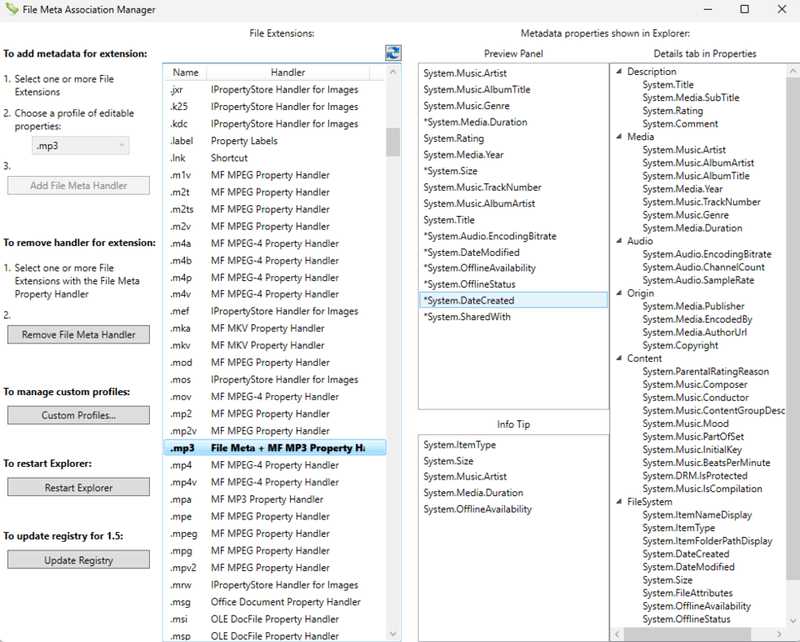
For file types that are not directly tagged by Microsoft (such as PNG, MP4, ZIP, etc.), you need to use third-party software. One tool that is recommended by the Microsoft support team itself is File Meta Association Manager (File Metadata) .
 |
| Click OK to save. |
This application helps you enable tagging for various file formats in just a few simple steps:
Step 1: Go to the File Meta Association Manager download page and download the latest version (currently v1.6).
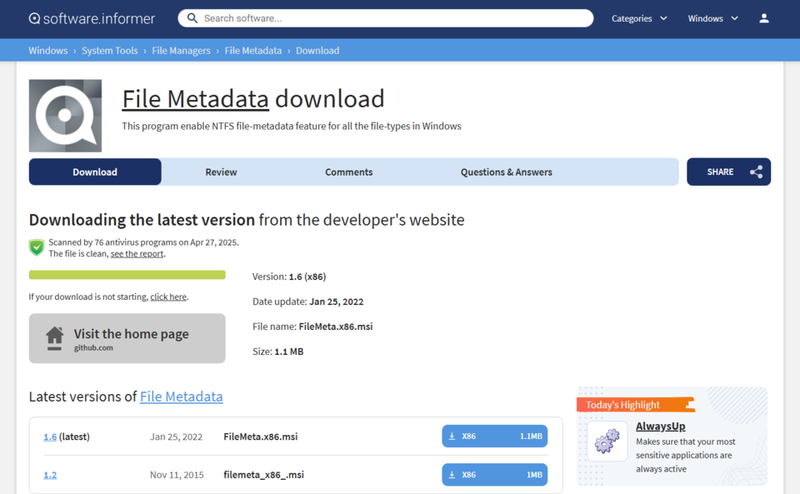 |
| Visit the File Meta Association Manager download page |
Step 2: Install the application by opening the downloaded file and confirming the installation steps.
Step 3: Type “File Meta Association Manager” into the Start bar and open the program.
Step 4: In the main interface, find the file format you want to support tagging (for example: .PNG).
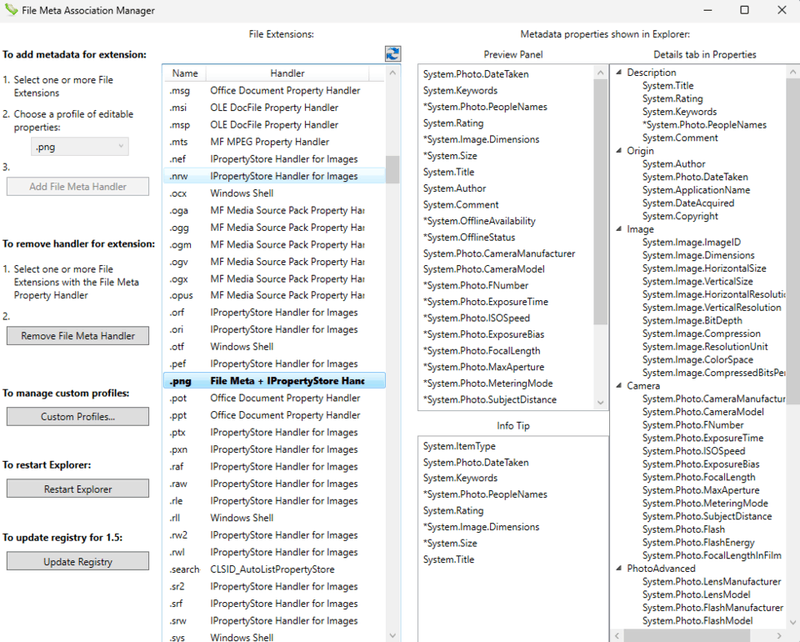 |
| Find the file format you want to support tagging (for example, .PNG). |
Step 5: Click on that format, then select “Add File Meta Handler” in the left pane.
Step 6: A confirmation dialog box appears, just click “Yes” and you're done.
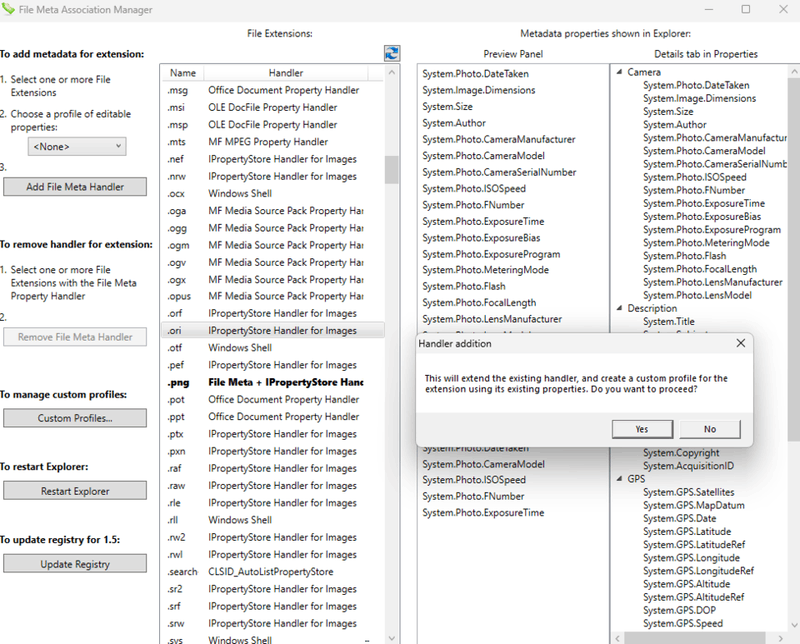 |
| A confirmation dialog box appears, just click “Yes” and you're done. |
Once you’re done, you can tag the unlocked file format as you would any other file. If you ever want to remove support, simply select the format again and hit “Remove File Meta Handler” .
With the above methods, you can completely tag both Windows-supported and non-Windows-supported files, making searching and managing data faster and more convenient. Whether you are an office worker, a student, or a creative person, this is definitely a small but extremely useful tip. Apply it now to save time and increase your computer's efficiency!
Source: https://baoquocte.vn/huong-dan-gan-tag-de-mo-tep-nhanh-tren-windows-10-don-gian-323844.html


![[Photo] President Luong Cuong attends special political-artistic television show "Golden Opportunity"](https://vstatic.vietnam.vn/vietnam/resource/IMAGE/2025/8/22/44ca13c28fa7476796f9aa3618ff74c4)










Comment (0)