This article will guide you how to bring This PC to the Win 10 Desktop. This helps save time searching for data and increases the efficiency of your computer!
 |
Instructions on how to quickly bring This PC to the Windows 10 Desktop
Bringing This PC to the Windows 10 desktop makes it easy to access without having to open File Explorer every time. Here are two simple ways to do it effectively.
Using Personalize
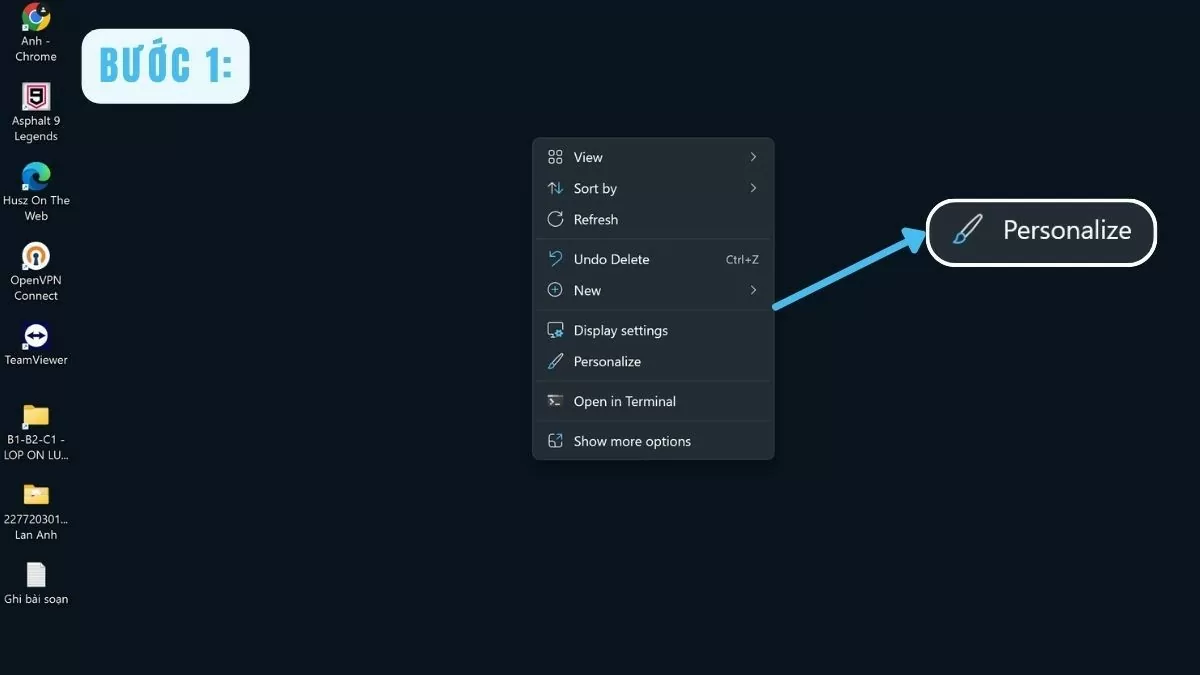
Step 1: To bring This PC to the Win 10 Desktop, right-click on an empty space on the screen and select Personalize from the context menu.
 |
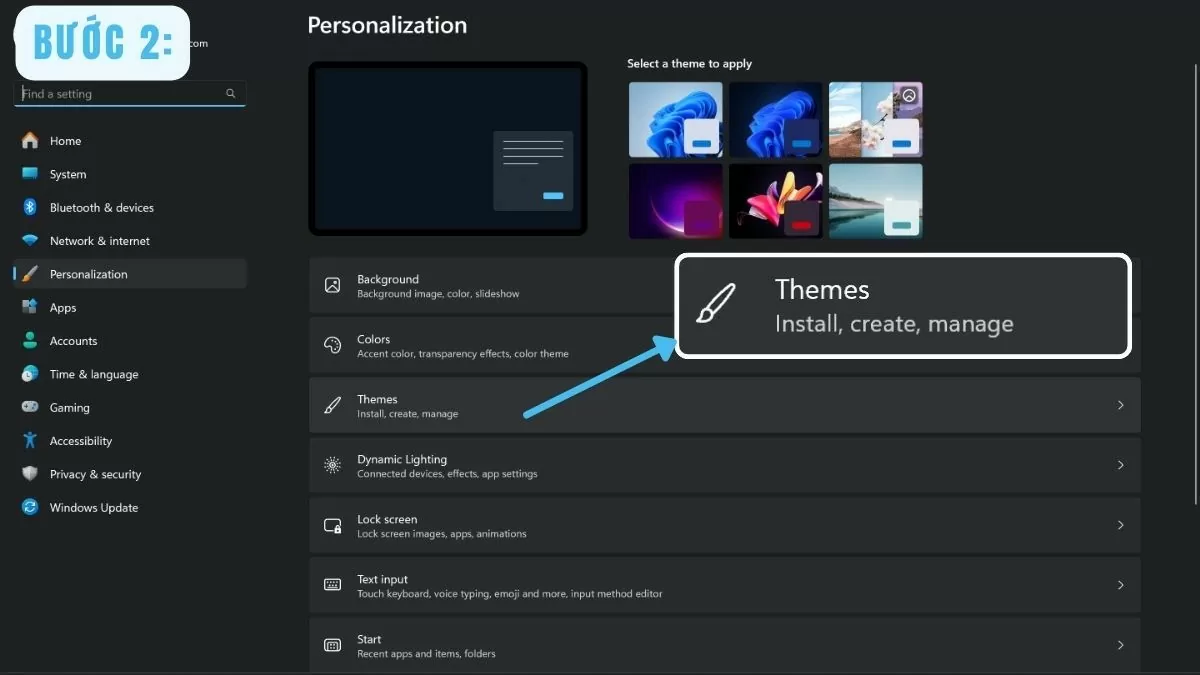
Step 2: In the Personalization window, select Themes on the left.
 |
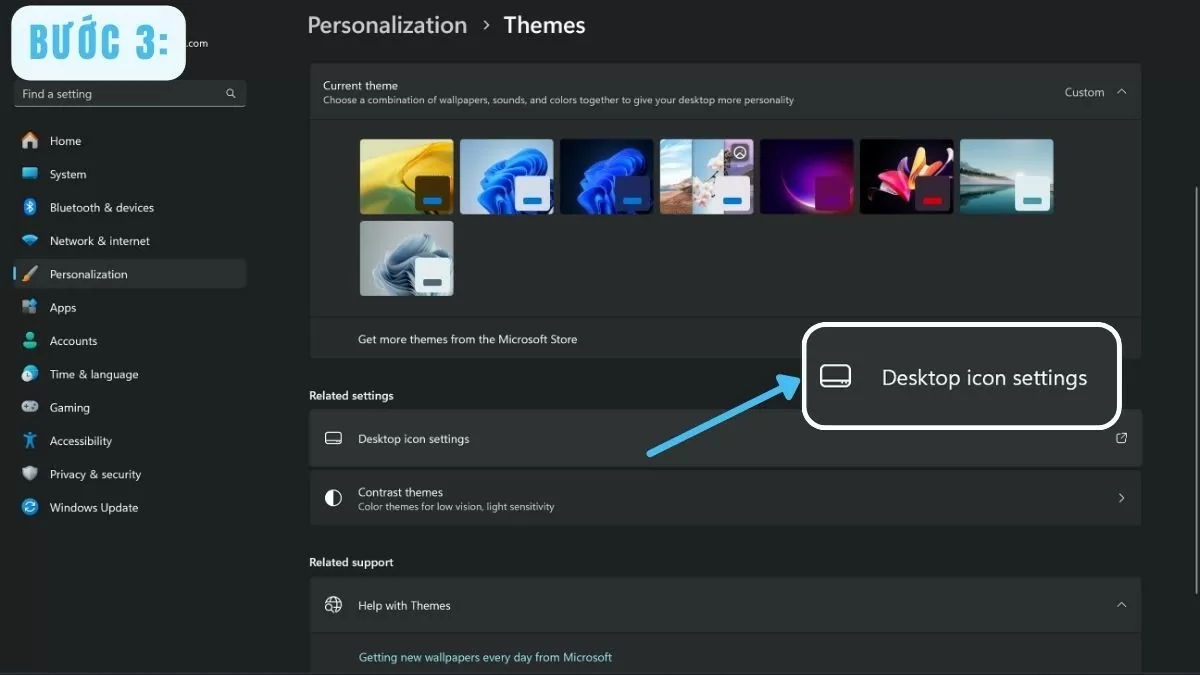
Step 3: In the right corner, click Desktop icon settings .
 |
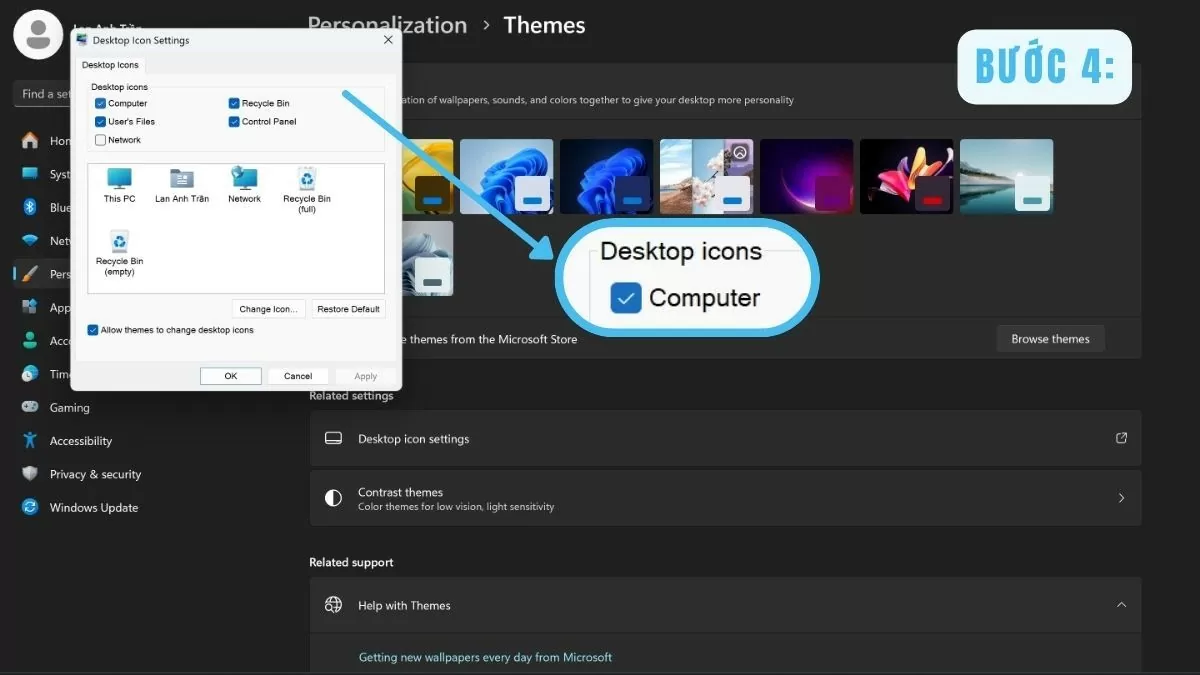
Step 4: Check the Computer box in the Desktop Icon Settings window.
 |
Step 5: Then, click OK to save changes.
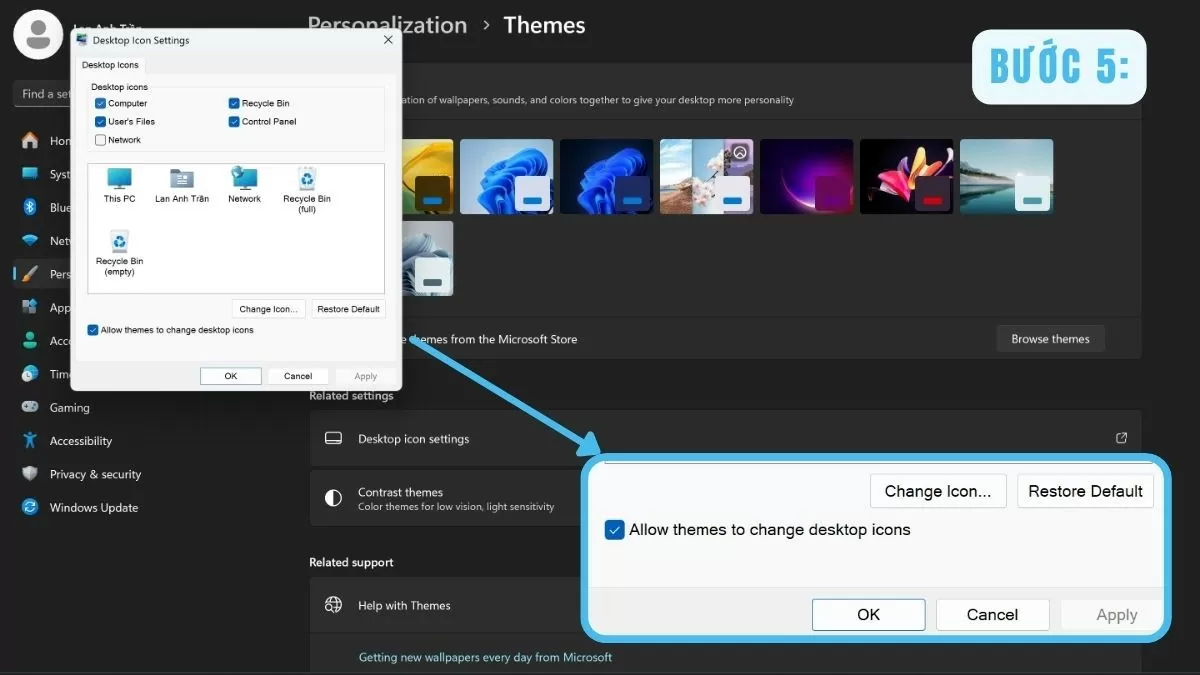 |
With just a few clicks through Personalize , the This PC icon will be displayed on the Desktop, allowing quick and convenient access.
Using File Explorer
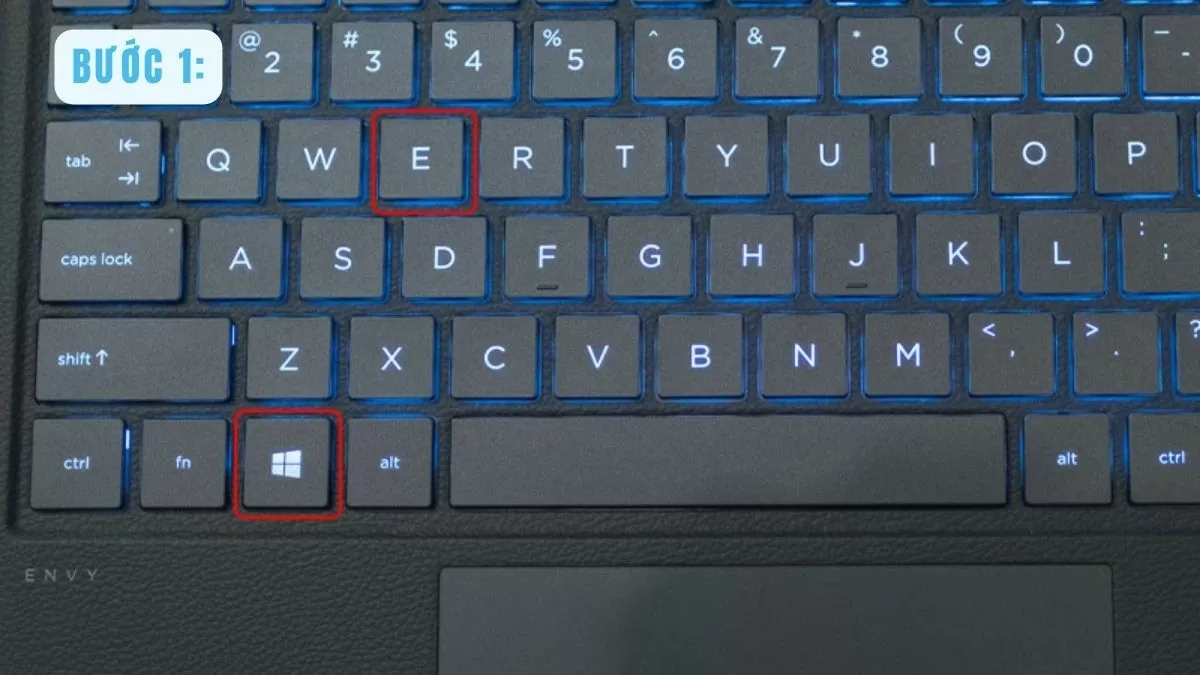
Step 1: Press Windows + E keys at the same time to open File Explorer.
 |
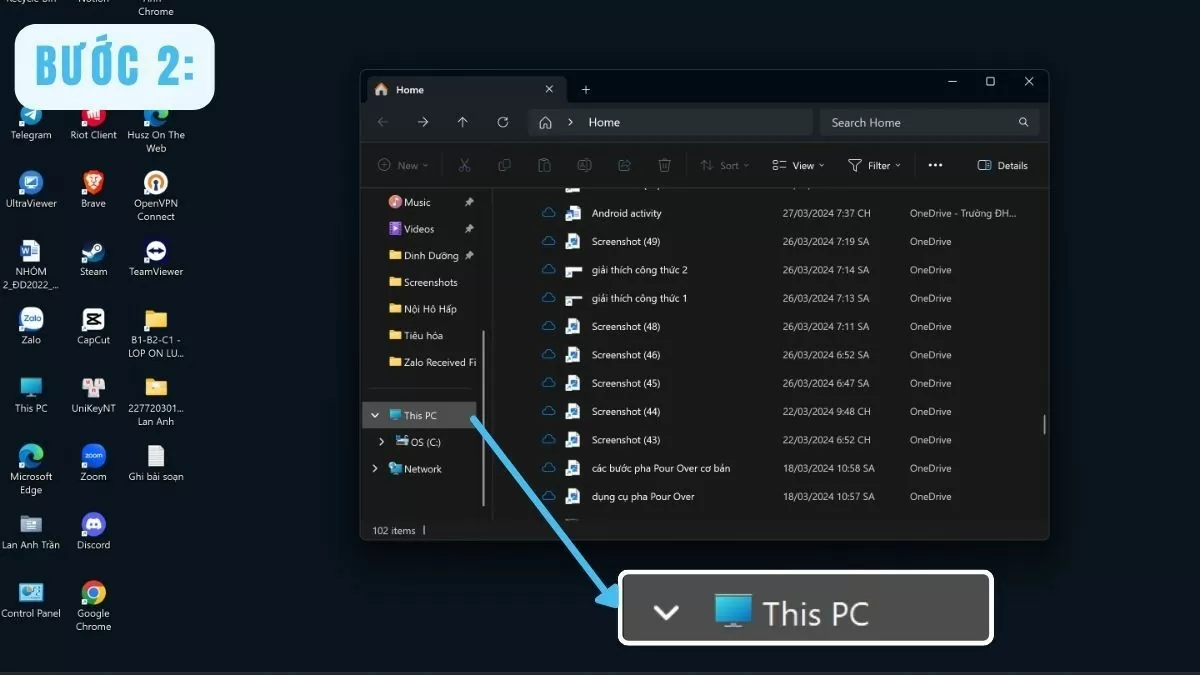
Step 2: Find This PC in the left sidebar and click on it.
 |
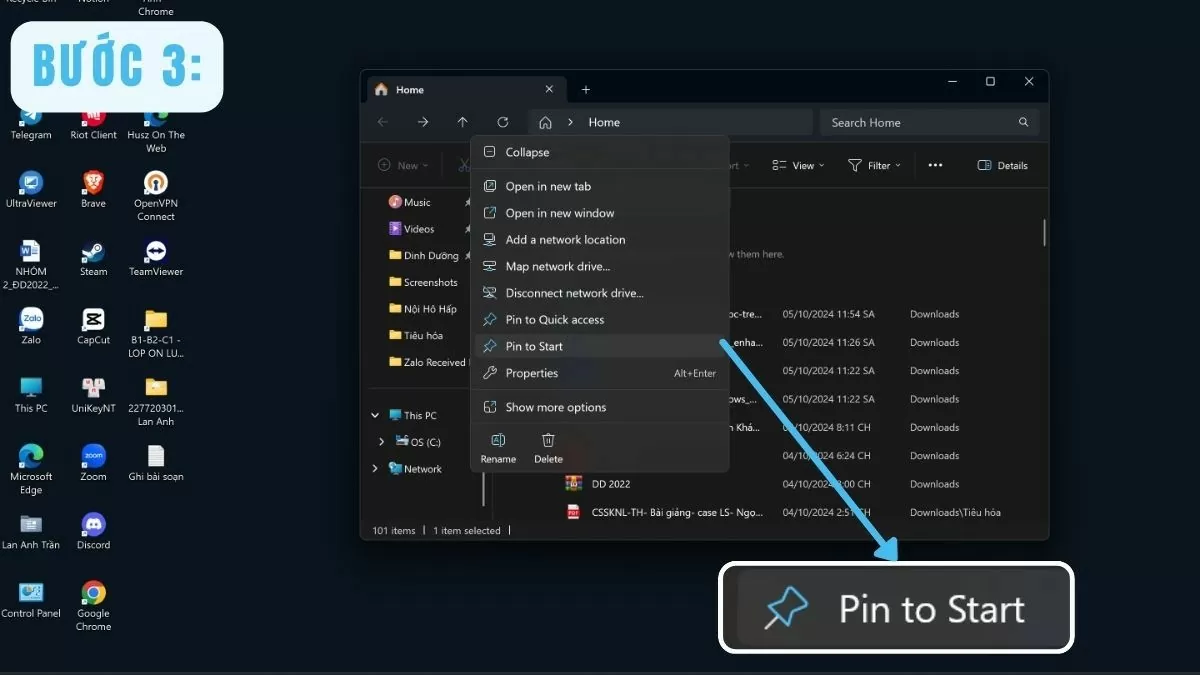
Step 3: Right-click on the This PC icon, select Pin to Start if you want to add it to the Start Menu.
 |
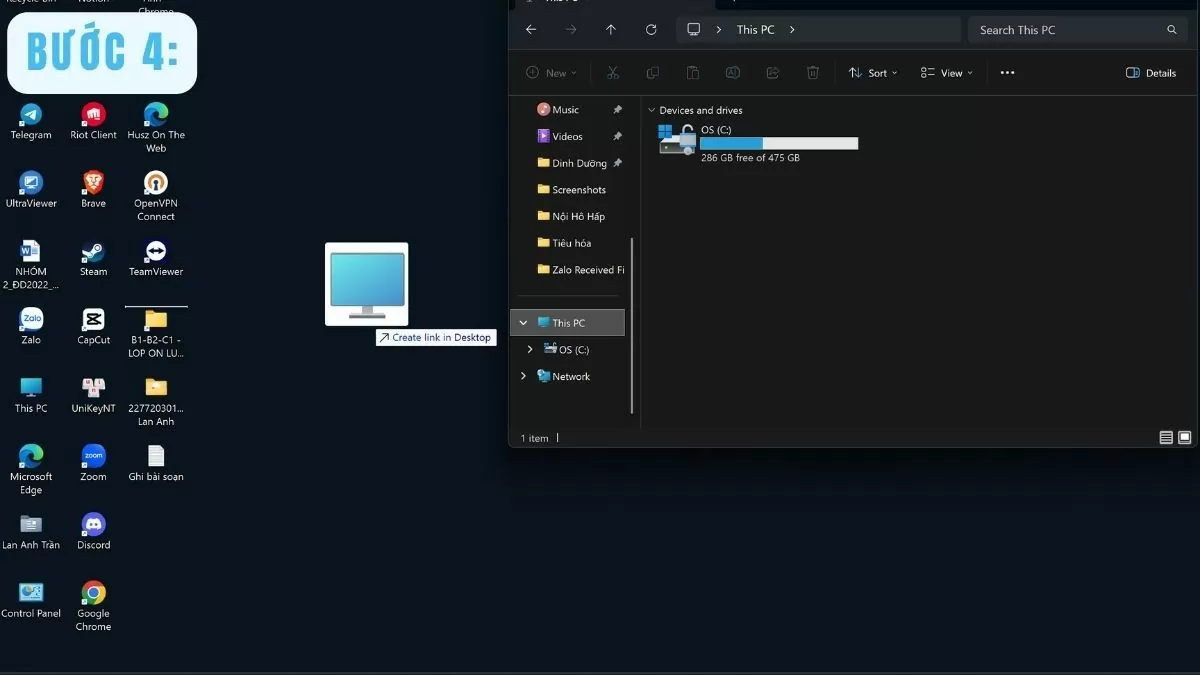
Step 4: To bring This PC to the screen, simply drag the This PC icon from File Explorer to the Desktop.
 |
With File Explorer, you can easily bring This PC to the Win 10 Desktop without adjusting system settings.
Customize This PC icon on Desktop simply
To create a personal workspace, customizing icons on the Desktop is essential. After completing the steps to bring This PC to the Win 10 screen, users can change the size or name according to their preferences.
How to change the size of the This PC icon
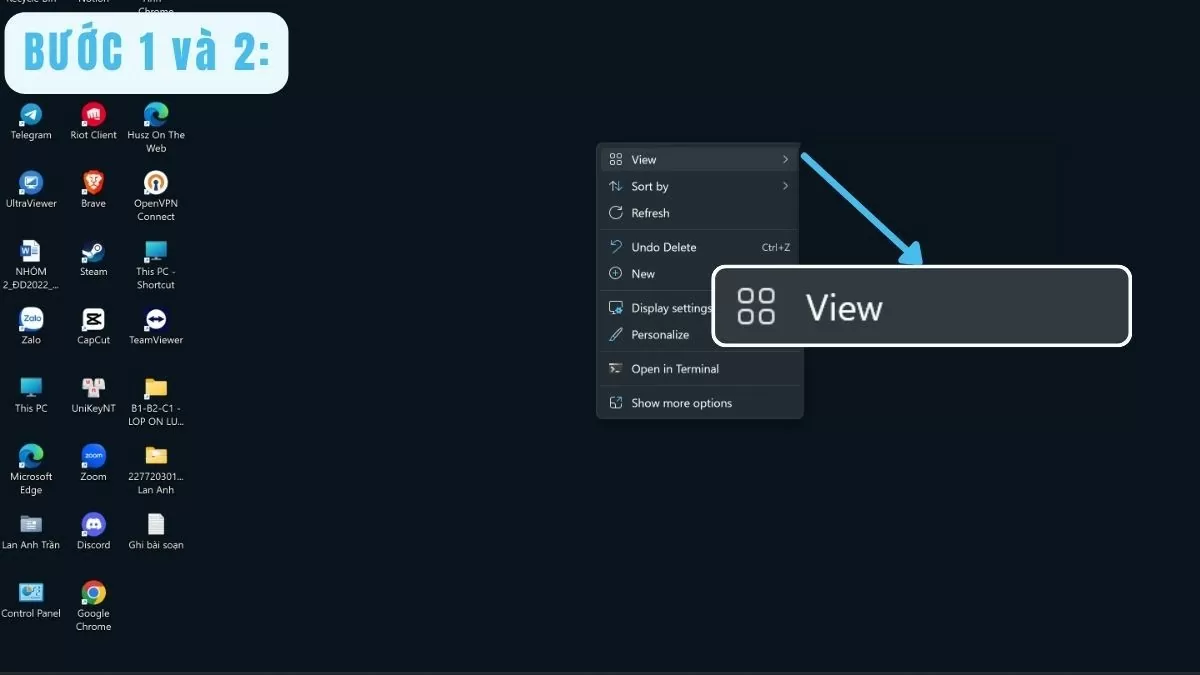
Step 1: Right-click on an empty space on the Desktop to open the context menu.
Step 2: Move the mouse to the View item.
 |
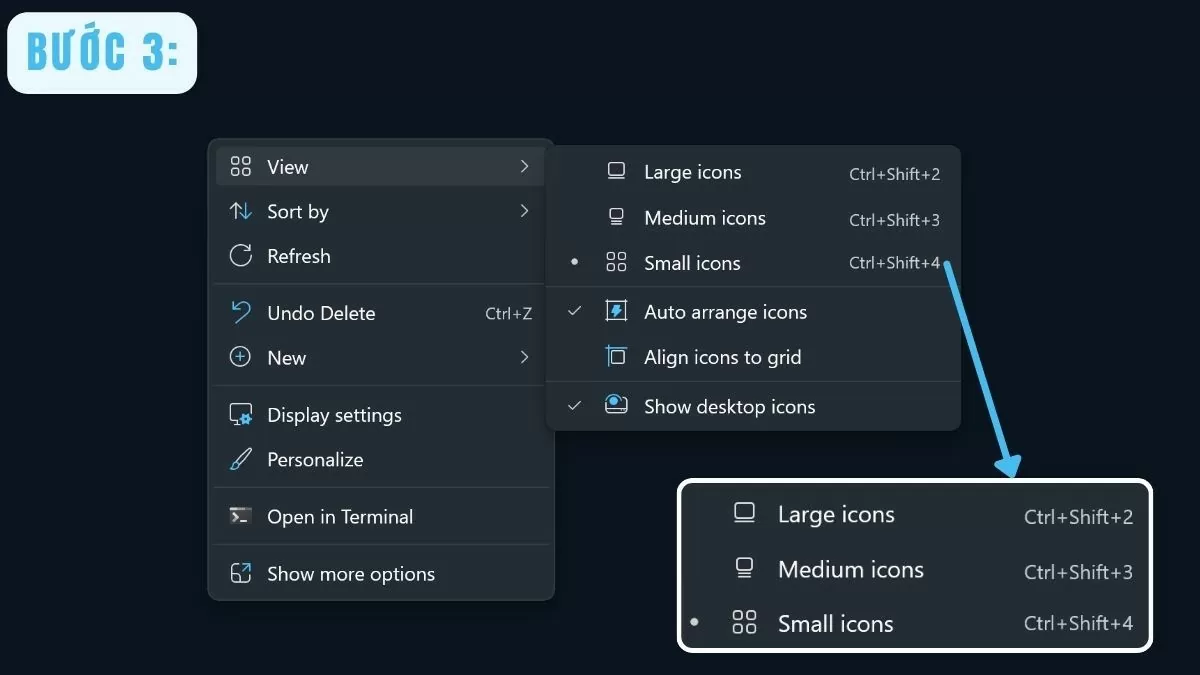
Step 3: Users can choose the icon size as desired: Small icons , Medium icons , or Large icons . This makes it easier to arrange space on the Desktop and create a more harmonious layout.
 |
Rename This PC icon
Step 1: First, right-click on the This PC icon on the Desktop.
Step 2: Select Rename from the context menu to change the name as needed.
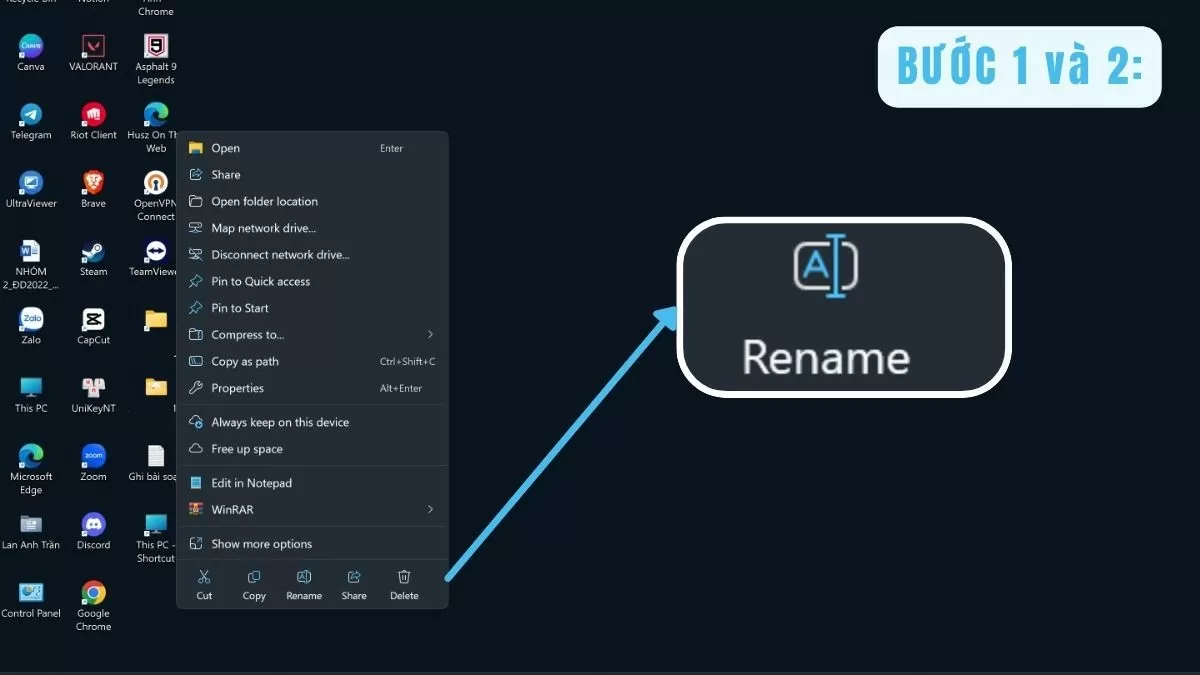 |
Step 3: Enter the new name as desired and press Enter to confirm. Renaming the This PC icon helps you customize the Desktop to your liking, making it easier to identify.
 |
With the simple steps above, you not only complete the way to bring This PC to the Win 10 screen but can also customize it to arrange it as you like. This makes it easy for you to search and access every time you open your computer.
In short, bringing This PC to the Win 10 Desktop is a simple but very effective trick. It helps you quickly manage and access files, bringing convenience in daily computer use.
Source












Comment (0)